Isandlwana: The Battle that Shook the British Empire
By | September 16, 2019
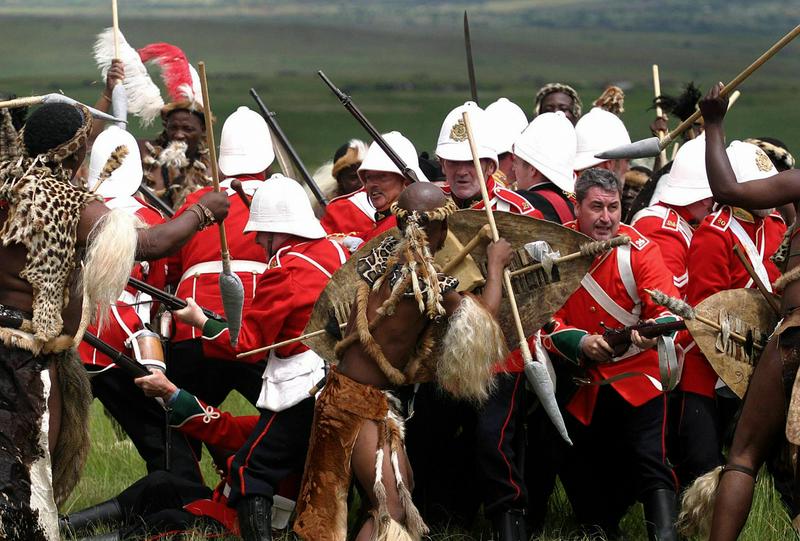
Reenactment of the Battle of Isandlwana. Source: (RAJESH JANTILAL/AFP/Getty Images)
The nineteenth century was the apogee of European imperialism. At the front of the countries dominating the globe was the British Empire. With its superior technology, the British were able to subjugate native people around the globe and win almost every battle.
That is why the British defeat at the Battle of Isandlwana in South Africa on January 22, 1879, was such a blow to the British imperial psyche and why it is still used today as a totem for anti-colonialism movements around the globe.
Map of Zululand from 1879. Source: (Wikimedia Commons)
Prelude to the Battle
In the second half of the nineteenth century, Zululand was located between the British colonies of Natal to the south and Transvaal to the north-northwest. The British had left the Zulus mostly alone until the discovery of large diamond mines in South Africa. Because of this, the British reconsidered their strategic objectives. In 1877, Lord Carnarvon, Secretary of State for the Colonies, decided to extend British influence by forming a federation of the two British colonies plus the Boer republics. Even though there were no diamond mines in Zululand, Carnavon decided that it would be better to pacify the region under the British yoke. The Zulus had a 40,000 warrior standing army, after all.
Cetshwayo, King of the Zulus (c. 1826-1884) by Carl Rudolph Sohn. Source: (Wikimedia Commons)
An Ultimatum
To do this, Carnavon’s agent, Sir Henry Bartle Frere issued an ultimatum on December 11, 1878, to the Zulu king Cetshwayo to disband its amabutho conscription system and accept a British presence at the Zulu’s royal household in their capital of Ulundi. If it did not, the British would occupy Zululand by force. They were given one month.
To King Cetshwayo, it was impossible to assent to the ultimatum. To disband his army would be a blow to the warrior identity of the Zulu people, and it would strip Cetshwayo of his power.
Lord Chelmsford (1827-1905).
The Invasion
When the ultimatum expired on January 11, 1879, a 4,500 British force led by Lieutenant General Frederick Thesiger, Second Baron Chelmsford (Lord Chelmsford), invaded Zulu territory at Rorke’s Drift. After leaving a force at Rorke’s Drift, he pushed into Zulu territory reaching the mountain of Isandlwana on January 20.
Chelmsford, probably out of a combination of haste to get to Cetshwayo’s capital and arrogance in British superiority did not bother to establish a proper fortified camp. However, his scouts found several hundred Zulu warriors in the vicinity. After engaging in skirmishes Chelmsford took two-thirds of his army in a direction where he thought the main Zulu army was. Chelmsford’s strategy was to try to draw the Zulus out to fight. He never considered that they would come to him.
Site of the battle with memorial for the slain Zulu warriors. Isandlwana is in the background. Source: (Joe Sohm/Visions of America/Universal Images Group via Getty Images)
Ambush
A 20,000 strong Zulu army was just five miles from the encampment. As these began to advance on the camp, the officer in charge sent a hurried dispatch to Lord Chelmsford. Chelmsford disregarded it, carrying on with his plan.
King Cetshwayo’s plan to divert the British was working perfectly. By 11:00 a.m. there were approximately 1,750 British in the encampment when scouts discovered by accident the main Zulu army or impi. They immediately launched their attack. The Zulus were mostly armed with cowhide shields and thrusting spears. They did have some outdated muskets but in no way did they have the technological edge of the British. Where they did have superiority was in British underestimation of their abilities, keen fighting discipline, blundering leadership in Lord Chelmsford and superior numbers. The Zulus outnumbered the British twenty to one at Isandlwana.
Zulu warriors attacking. Source: (Wikimedia Commons)
The Horns of the Buffalo
The attack was earlier than Cetshwayo and his chief general would have liked. They originally planned to attack the morning of the 23rd. Regardless, the Zulus employed their traditional battlefield plan of izimpondo zankomo, which is the “Horns of the Buffalo.” Zulu warriors formed right and left horns while the main mass of troops formed a center chest. Their goal was to encircle the British on all sides with the horns closing around the enemy. It is a credit to Zulu battlefield discipline in that they were able to, even when surprised, improvise well enough to carry on a well-organized plan of attack.
Battle of Isandlwana painting by Charles Edwin Fripp (1854–1906). Source: (Wikipedia)
Defeat
Although the Zulus sustained upwards of 4,500 casualties (1,000 to 2,500 dead and 2,000 wounded). The British force of 1,700 was almost completely destroyed. Only five British officers and about 50 soldiers survived as well as some non-army native levies. It was a decisive victory for King Cetshwayo and the Zulus. At 3:00 pm, Lord Chelmsford realized his error and returned to the encampment -- only to find it destroyed. With his main column destroyed, he had to call off the invasion.
The Defence of Rorke's Drift by Alphonse de Neuville. Source: (Wikimedia Commons)
Aftermath
The Zulu army left the field, but not before a large impi of 4,000 warriors attacked and were repelled by the 150 British soldiers at Rorke’s Drift -- eleven Victory Crosses were awarded to British soldiers in this engagement. This secondary action of the day did provide some boost to the British ego.
But when word first reached Britain on February 11, 1879, of this first battle of the Anglo-Zulu War was simply shock. The British wanted a scapegoat and while Lord Chelmsford was the obvious target he had powerful friends. He also hid evidence of the loss, fabricated ammunition shortages, and blamed his now dead officer in charge of the camp for the loss.
Chelmsford carried on the war and restaged a second invasion. This time, the British changed tactics and used entrenching methods and avoided staging open battles with lines of infantry. The British army eventually defeated and captured King Cetshwayo after the Battle of Ulundi on July 4, 1879, thus essentially ending the war. Chelmsford was recalled and never did serve on the field again. However, he was given honors by Queen Victoria. It was only later did all his blundering become clear and the historical record has become marked harshly against him.